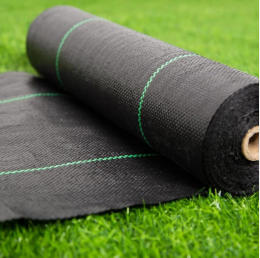
Weed barrier fabric, also known as landscape fabric, is an effective and simple way to keep weeds at bay in your garden or yard. It works by blocking sunlight, preventing weeds from growing while allowing water and nutrients to pass through to your plants. Installing weed barrier fabric properly ensures long-lasting protection and a neat, professional look for your landscaping. In this guide, we’ll cover everything you need to know to install weed barrier fabric effectively.
Benefits of Weed Barrier Fabric
Before diving into the installation process, let’s quickly highlight why you should consider using weed barrier fabric:
-
Weed Control: Blocks weeds from growing, reducing the need for manual weeding or chemical herbicides.
-
Water Efficiency: Allows water to seep through to the soil, helping plants thrive without water pooling on the surface.
-
Soil Protection: Prevents erosion and helps retain soil moisture.
-
Low Maintenance: Reduces garden upkeep by minimizing weed growth.
-
Improved Aesthetics: Keeps garden beds neat and organized.
Now that we understand the benefits, let’s move on to the installation process.
Tools and Materials You Will Need
Before starting, gather the following tools and materials:
-
Weed barrier fabric (choose a high-quality, UV-resistant option)
-
Landscape staples or fabric pins
-
Scissors or a utility knife
-
Measuring tape
-
Shovel or garden hoe
-
Mulch (optional, for added coverage and aesthetic appeal)
-
Plants or garden fixtures (if applicable)
Step-by-Step Installation Process
Step 1: Prepare the Area
-
Clear the Space: Remove all existing weeds, grass, rocks, and debris from the area where you plan that how to install weed barrier fabric. This ensures a smooth surface for installation.
-
Level the Soil: Use a shovel or garden hoe to level the soil. Remove any large clumps of dirt and ensure the area is even. Compact the soil gently to create a firm base.
-
Add Soil Amendments (Optional): If needed, improve your soil with compost or fertilizers before installing the fabric. This step is crucial if you’re planting new vegetation.
Step 2: Measure and Cut the Fabric
-
Measure the Area: Use a measuring tape to determine the dimensions of the area to be covered. Add a few extra inches to the measurements to ensure proper overlap and coverage.
-
Cut the Fabric: Lay the weed barrier fabric on a flat surface and cut it to size using scissors or a utility knife. Cut slightly larger pieces than required to ensure you have enough material to overlap edges.
Step 3: Lay the Fabric
-
Position the Fabric: Start by laying the fabric flat over the prepared soil. Ensure the shiny or rough side of the fabric faces up (refer to the manufacturer’s instructions if unsure).
-
Overlap Edges: Overlap the edges of the fabric by at least 6 inches to prevent weeds from sneaking through gaps.
-
Secure the Fabric: Use landscape staples or fabric pins to secure the fabric to the ground. Place staples every 12 to 18 inches along the edges and in the center to keep the fabric in place.
Step 4: Cut Openings for Plants
-
Mark Plant Locations: If you’re installing fabric in an area with existing plants or planning to add plants, mark their positions on the fabric.
-
Make X-shaped Cuts: Use a utility knife or scissors to make small X-shaped cuts where plants will go. Fold back the flaps of the fabric to create an opening.
-
Plant Through the Fabric: Dig a hole through the opening, place the plant in the soil, and fold the fabric back around the base of the plant. Secure the fabric around the plant with additional staples if needed.
Step 5: Add Mulch (Optional)
-
Spread Mulch: For added protection and a polished look, spread a 2-3 inch layer of mulch over the fabric. This helps hold the fabric in place, provides additional weed suppression, and enhances the garden’s appearance.
-
Avoid Overlapping Plants: Ensure mulch does not pile up against the base of plants, as this can cause rot or disease.
Step 6: Inspect and Maintain
-
Check Edges: Periodically check the edges of the fabric to ensure they remain secure. Re-staple any loose areas.
-
Remove Debris: Clear any leaves or debris that may accumulate on top of the fabric, as they can create pockets for weeds to grow.
-
Replace Mulch (if used): Refresh the mulch layer annually to maintain a clean and protective covering.
Common Mistakes to Avoid
-
Skipping Ground Preparation: Failing to clear and level the area can result in uneven fabric placement and persistent weed growth.
-
Using Low-Quality Fabric: Invest in a durable, UV-resistant fabric to ensure long-lasting performance.
-
Improper Overlapping: Ensure at least a 6-inch overlap between fabric pieces to prevent gaps where weeds can grow.
-
Neglecting to Secure the Fabric: Use enough staples or pins to keep the fabric firmly in place, especially in windy areas.
-
Ignoring Maintenance: Regularly inspect the fabric and clear debris to ensure it continues to function effectively.
Tips for a Successful Installation
-
Choose the Right Fabric: Use a high-quality weed barrier fabric suited to your specific needs, whether for gardens, pathways, or larger landscapes.
-
Plan Your Layout: Pre-plan where plants or fixtures will go before cutting the fabric.
-
Combine with Mulch: Adding mulch not only improves the look but also increases the effectiveness of the weed barrier.
-
Install in Dry Weather: Choose a dry day to install the fabric to make the process smoother and prevent soil compaction.
Conclusion
Installing weed barrier fabric is a straightforward process that can save you countless hours of weeding while enhancing the look and health of your garden. By following these steps and taking the time to install it correctly, you’ll enjoy a low-maintenance, weed-free landscape for years to come. With proper preparation, quality materials, and a little effort, you can transform your outdoor spaces into neat, thriving areas that are both functional and beautiful.


Leave a Reply